
Connect to Elasticsearch (Opensearch Service
In this tutorial, we are gonna install elasticsearch-php client and connect to Opensearch Service (Elasticsearch 7.10) on AWS Cloud.
Prerequisites
- You have already installed Elasticsearch 7.10 on Opensearch service with public access (internet), so we just go installing elasticsearch-php-client
- Using PHP 8.3.12 for elasticsearch-php client v7.11.0
- Installed Apache webserver
- Ubuntu 24.04
Summary steps
- Install composer on your local computer
- Install elasticsearch-php client v7.11.0
- Test connect to Elasticsearch 7.10
- Test create index
- Insert data
Let’s get started!
Install composer on your local computer
My workspace is under /var/www/html/elasticsearch-php
To install elasticsearch-php client, we need composer. Install it with the following command:
php -r "copy(' 'composer-setup.php');"

php -r "if (hash_file('sha384', 'composer-setup.php') === 'dac665fdc30fdd8ec78b38b9800061b4150413ff2e3b6f88543c636f7cd84f6db9189d43a81e5503cda447da73c7e5b6') { echo 'Installer verified'; } else { echo 'Installer corrupt'; unlink('composer-setup.php'); } echo PHP_EOL;"

php composer-setup.php

php -r "unlink('composer-setup.php');"
After running above command, it creates a file named composer.phar. In the next step we will use composer.phar to install elasticsearch-php client.
Install elasticsearch-php client v7.11.0
We will use elasticsearch-php client v7.11.0 (not latest version), because our elasticsearch is v7.10.0. I am worried if using latest version of elasticsearch-php client, it will not work (backward compatibility) for elasticsearch v7.10.0.
In order to install elasticsearch-php client v7.11.0, the command is as follows:
php composer.phar require elasticsearch/elasticsearch:7.11.0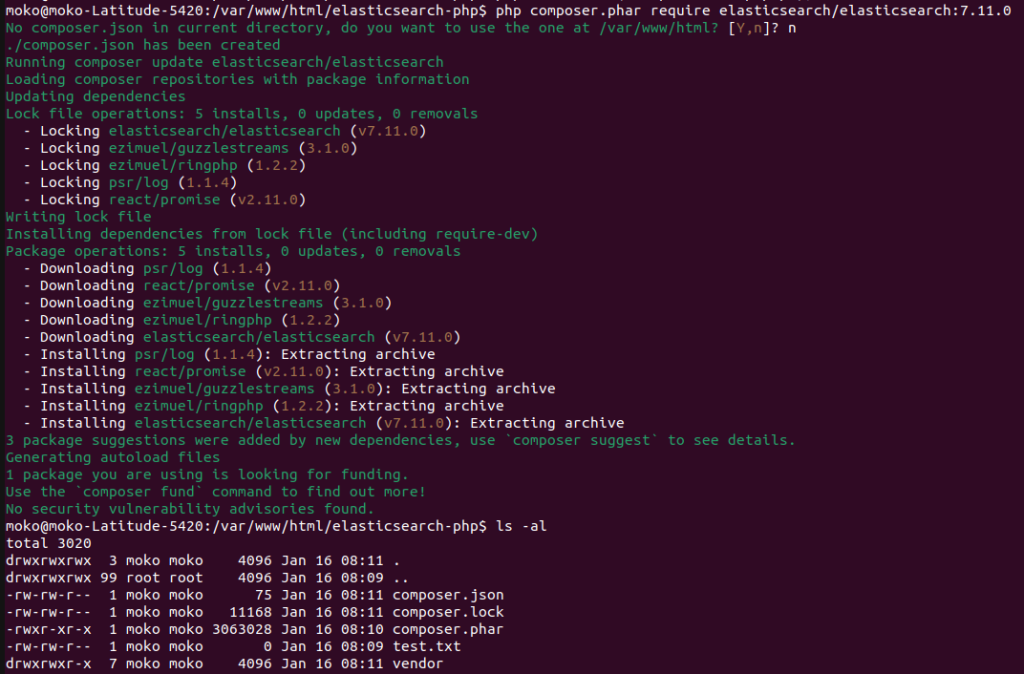
If you run ls -al, you will see vendor folder. The elasticsearch-php client is installed inside that folder.
Test connect to Elasticsearch 7.10
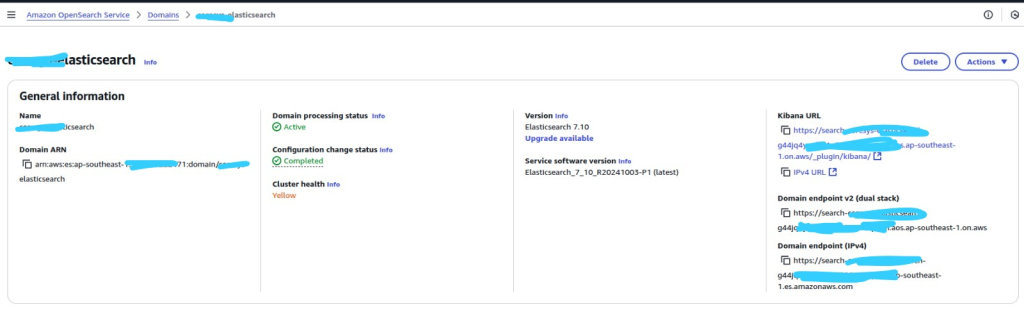
For your information, this is my elasticsearch 7.10 setup installed on Opensearch service:
Now, let’s focus on testing connecting to elasticsearch 7.10. Create a file named index.php in elasticsearch-php folder. Then paste this script:
<?php
	require 'vendor/autoload.php';

	use Elasticsearch\ClientBuilder;

	$client = ClientBuilder::create()
	    ->setHosts(['https://search-xxxx-elasticsearch-g44-xxxx.ap-southeast-1.es.amazonaws.com:443'])
	    ->setBasicAuthentication('your elasticsearch username', 'your elasticsearch username')
	    ->build();

    $response = $client->info();

    echo "<pre>";
    var_dump($response);
?>
Explanation:
- Change setHosts value with your elasticsearch domain endpoint IPv4 (See above image)
- Change setBasicAuthentication values with your elasticsearch username, and password (this username, password you got from initial elasticsearch / opensearch service installation)
Run:
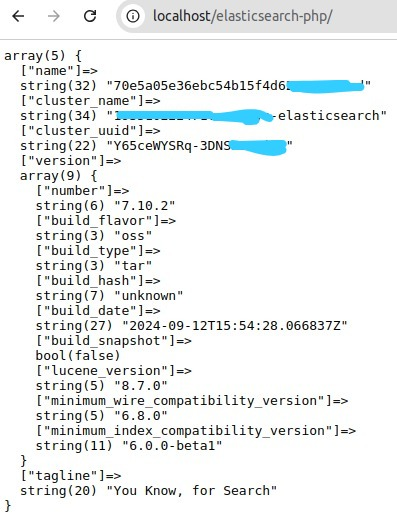
If the connection is success, then the output is like this:
Test create index
By this time, we have successfully connected to elasticsearch v7.10.0.
Now we are going to test creating an simple index.
Modify your index.php and paste this script:
<?php
	require 'vendor/autoload.php';

	use Elasticsearch\ClientBuilder;

	$client = ClientBuilder::create()
	    ->setHosts(['
	    ->setBasicAuthentication('your elasticsearch username', 'your elasticsearch username')
	    ->build();

	$params = [
		"index" => "test-elasticsearch-php"
	];

	$response = $client->indices()->create($params);

	echo "<pre>";
	print_r($response);
?>
Run again:
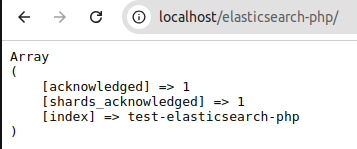
If succeed, the response is like this:
Check on kibana dashboard (provided by Opensearch service), go to Open Distro for Elasticsearch > Index Management, you will see test-elasticsearch-php is on there.
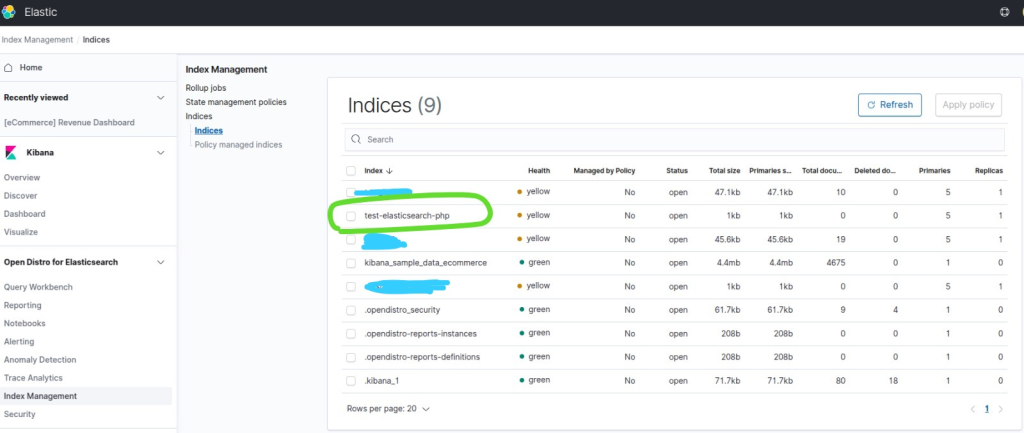
Great!, we have successfully created an index. Now let’s insert data in the next step.
Insert data
Modify your index.php, and paste in it:
<?php
	require 'vendor/autoload.php';

	use Elasticsearch\ClientBuilder;

	$client = ClientBuilder::create()
	    ->setHosts(['
	    ->setBasicAuthentication('your elasticsearch username', 'your elasticsearch username')
	    ->build();

	$params = [
		"index" 	=> "test-elasticsearch-php",
		"id"		=> "123",
		"body"		=> [
						"name" => "Moko",
						"address" => "Jl. Greenstreet",
						"create_date" => "2024-01-01 12:11:01"
					]
	];

	$response = $client->index($params);

	echo "<pre>";
	print_r($response);
?>
Run:
It outputs:
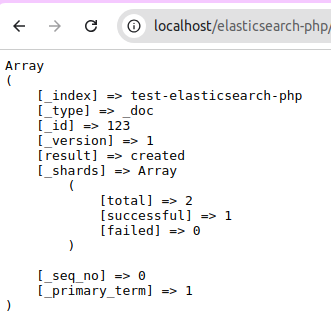
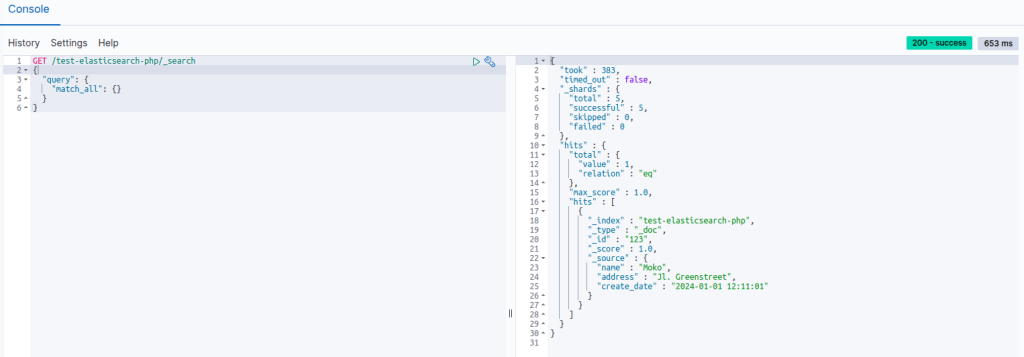
If you see on kibana dashboard, it’s stored in index: test-elasticsearch-php
Related
buymodafinilka
Berita Olahraga
News
Berita Terkini
Berita Terbaru
Berita Teknologi
Seputar Teknologi
Drama Korea
Resep Masakan
Pendidikan
Berita Terbaru
Berita Terbaru
Berita Terbaru


Hi!
Most business owners think their website is “okay.” But “okay” doesn’t grow your business.
I took a quick look at buymodafinilka.com and noticed a few gaps.
We specialize in creating high-performing websites that actually bring in real clients.
I’d love to send you a **free, no-pressure audit** of your site — covering speed, structure, and design — so you can see exactly where improvements can make a difference.
Start your redesign here: https://webdsign.work/connect
Thanks,